Using MIDI with Raspberry Pi
I have summarized how to connect Raspberry Pi to musical instruments, keyboards, and PCs via MIDI, divided into different cases.
- In the case of a Raspberry Pi becoming a tone generator.
- Connecting a USB Keyboard to USB port
- Connecting a USB-MIDI transport cable
- Connecting WebMIDI to a tone generator
- In the case of a Raspberry Pi becoming a sequencer
- In the case of connecting PC to Raspberry Pi via MIDI
Preparing Raspberry Pi
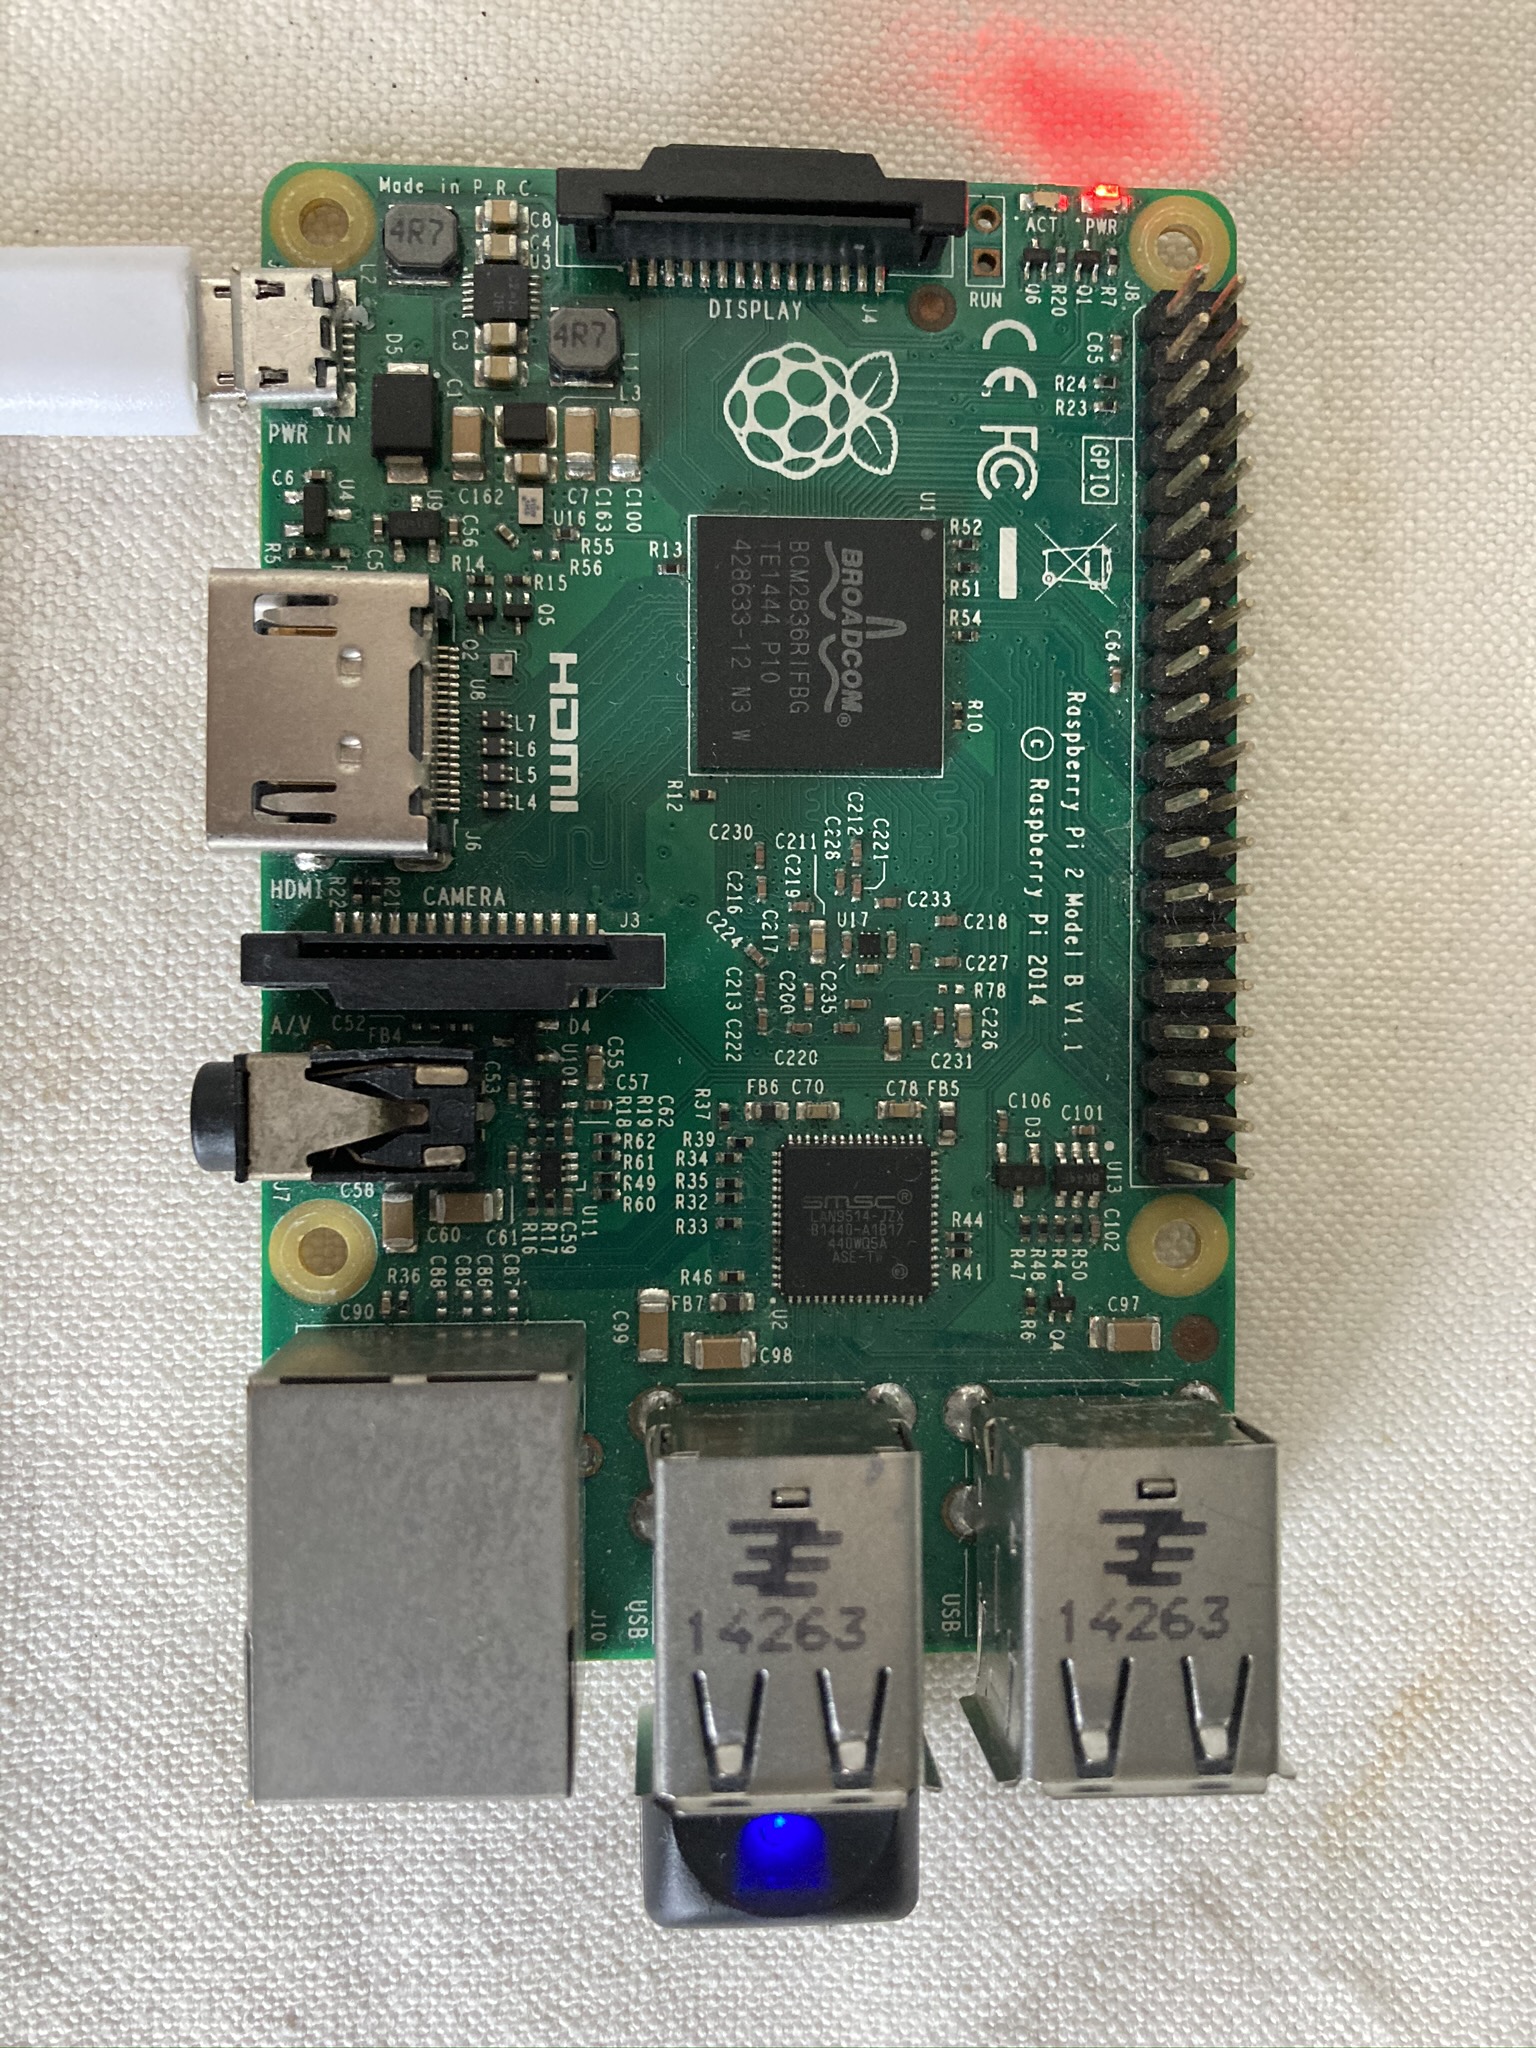
For the purposes of this explanation, I will use a Raspberry Pi 2 model B that I have on hand. Download the operating system from hear. In this time, I download and istall Raspberry Pi OS (32-bit) with desktop.
Raspberry Pi becoming a tone generator
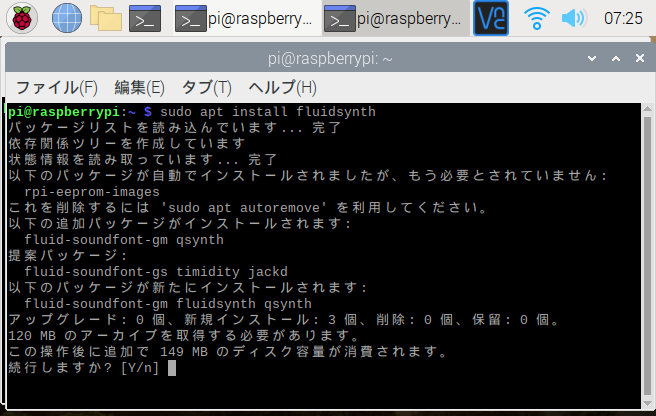
To use Raspberry Pi as a tone generator, install the software synth fluidsynth. Open the Console and enter the following command.
> sudo apt install fluidsynth
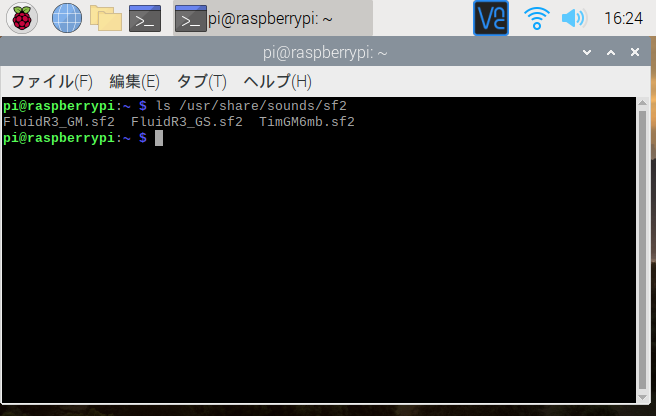
After the install is finished, Check whether the sound data, sound font is installed by using the following command. If the GM sound source, FluidR3_GM.sf2, is installed, then you're OK.
>ls /usr/share/sounds/sf2
If GM sound source is not installed, you can install it with the following command.
>sudo apt-get install fluid-soundfont-gm
Insted of a GM sound source, Roland GS sound source FluidR3_GM.sf2 can be installed with the following command.
>sudo apt-get install fluid-soundfont-gs
Connecting a USB Keyboard to USB port
A USB keyboard can be connected directly to the USB port.s In the photo below, a KORG nanoKey2 is connected.
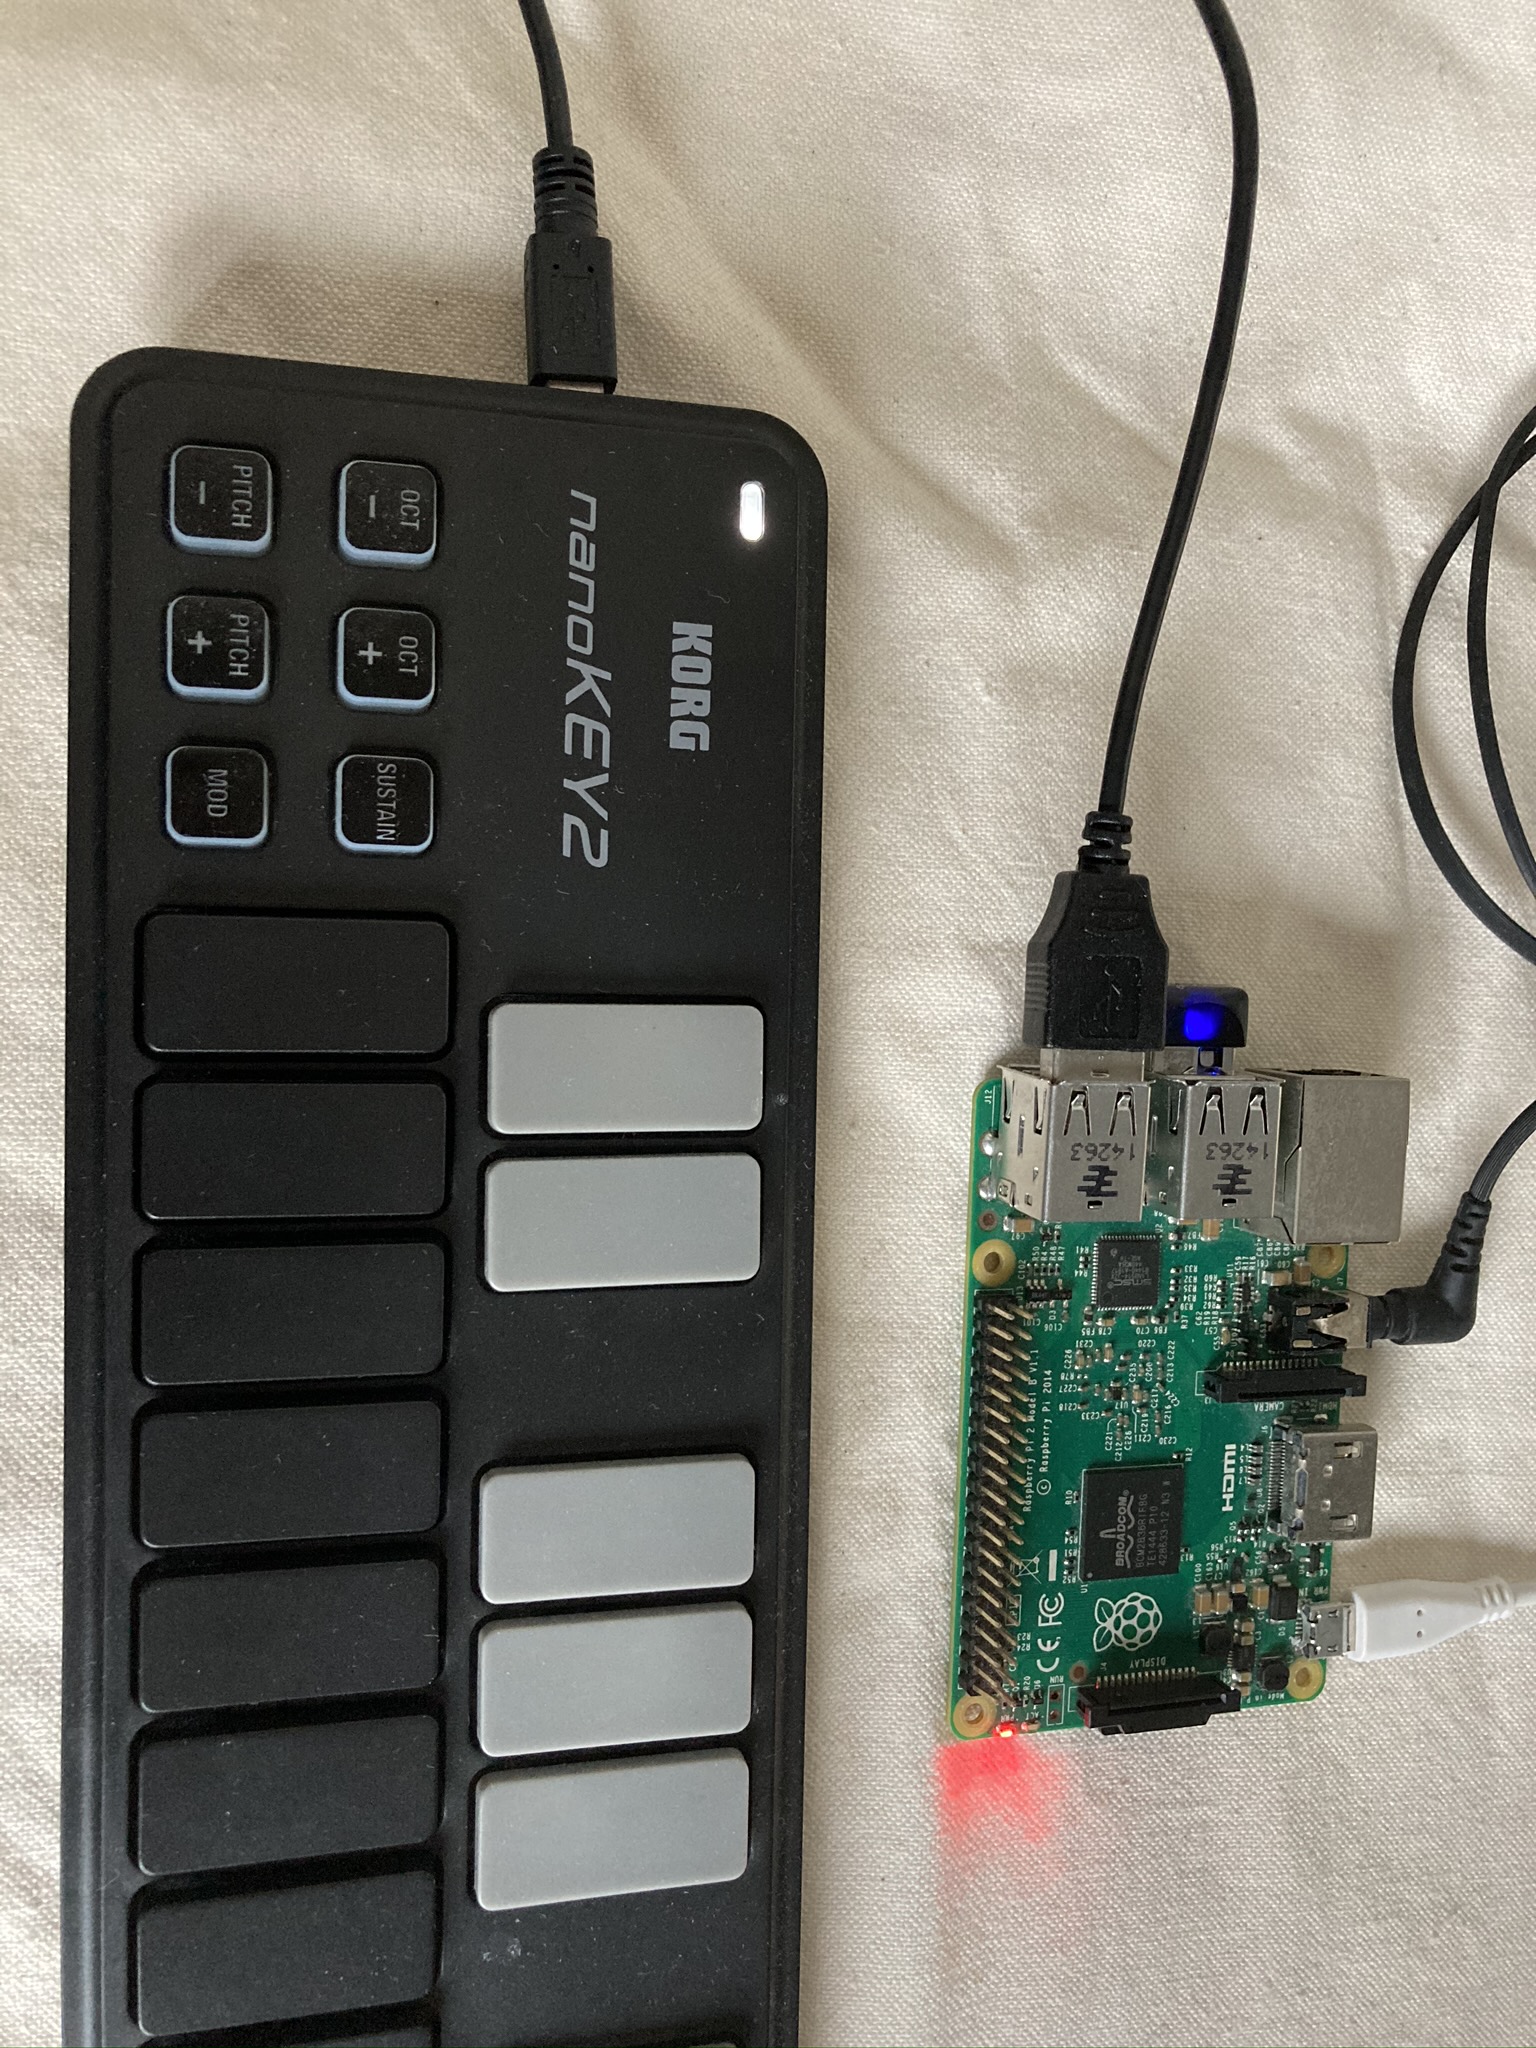
You can check that the keyboard is connected with the following command. The nanoKey2 is connected to hw:1.0.0. Remember this hw:1.0.0.
>> amidi -l

To play the keyboard and make a sound, enter the command as follows. Now, when you play the keyboard, sound will come out from the headphone connected to the Raspberry Pi.
> fluidsynth -s -a alsa -m alsa_raw -g 0.4 -o midi.alsa.device=hw:1,0,0 /usr/share/sounds/sf2/FluidR3_GM.sf2
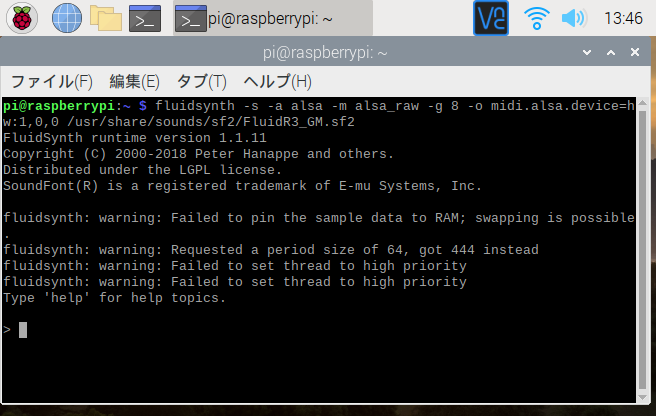
- -s: Start FluidSynth as a server process
- -a alsa; The audio driver, alsa to use.
- -m alsa_raw: The name of the midi driver, alsa_raw to use.
- -g 8: Set the master gain [0 > gain < 10, default = 0.2]
- -o midi.alsa.device=hw:1,0,0: Define a setting, -o name=value
- /usr/share/sounds/sf2/FluidR3_GM.sf2: Sound font
To play a MIDI file (filename.mid), type the following command. After the MIDI file is played, fluidsynth will exit.
> fluidsynth -a alsa -n -i -g 0.4 /usr/share/sounds/sf2/FluidR3_GM.sf2 filename.mid
- -i: Don't read commands from the shell.
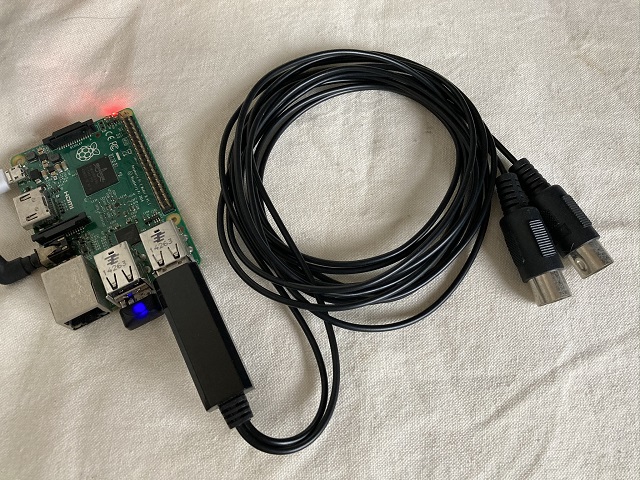
Connecting a USB-MIDI transport cable
I connected a USB-MIDI transport cable I had on hand. It was a cheap cable, but I was able to get it to be recognized by the Raspberry Pi without any problems.
> pi@raspberrypi:~ $ amidi -l
Dir Device    Name
IO  hw:1,0,0  USB MIDI Interface MIDI 1
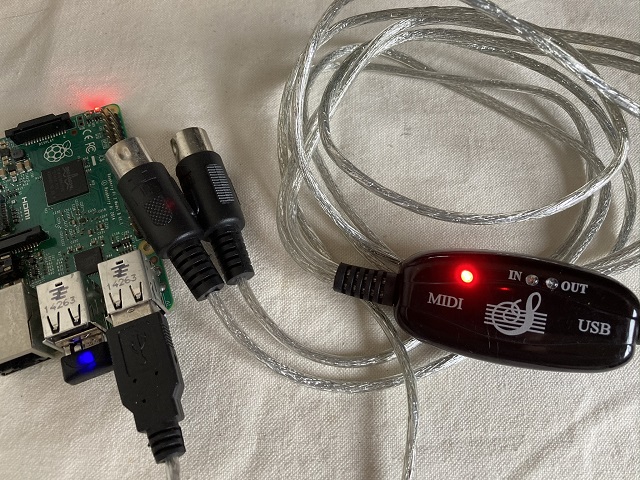
> pi@raspberrypi:~ $ amidi -l
Dir Device    Name
IO  hw:1,0,0  CH345 MIDI 1
Monitoring MIDI messages, enter the following command:
pi@raspberrypi:~ $ amidi -d -p hw:1,0,0

90 35 66
80 35 40
90 35 32
80 35 40
90 37 2F
Sending a MIDI message, enter the following command:
pi@raspberrypi:~ $ amidi -S'90 35 66 80 35 40' -p hw:1,0,0
A document of amidi can be found here.
Connecting WebMIDI to a tone generator
Chromium v.78 installed on Raspberry Pi can use Web MIDI API. Use fluidsynth as a tone gererator. Start fluidsynth as a port.
> fluidsynth -s -a alsa -m alsa_seq -i /usr/share/sounds/sf2/FluidR3_GM.sf2
Open MIDI Send Test page by the browser.

Select Synth input port as MIDI out port. Click the push button. You should hear a sound.
Connecting a tone generator to USB port
I connected Pocket Miku(NSX-39) as a tone generator and Korg nanoKEY2 too.
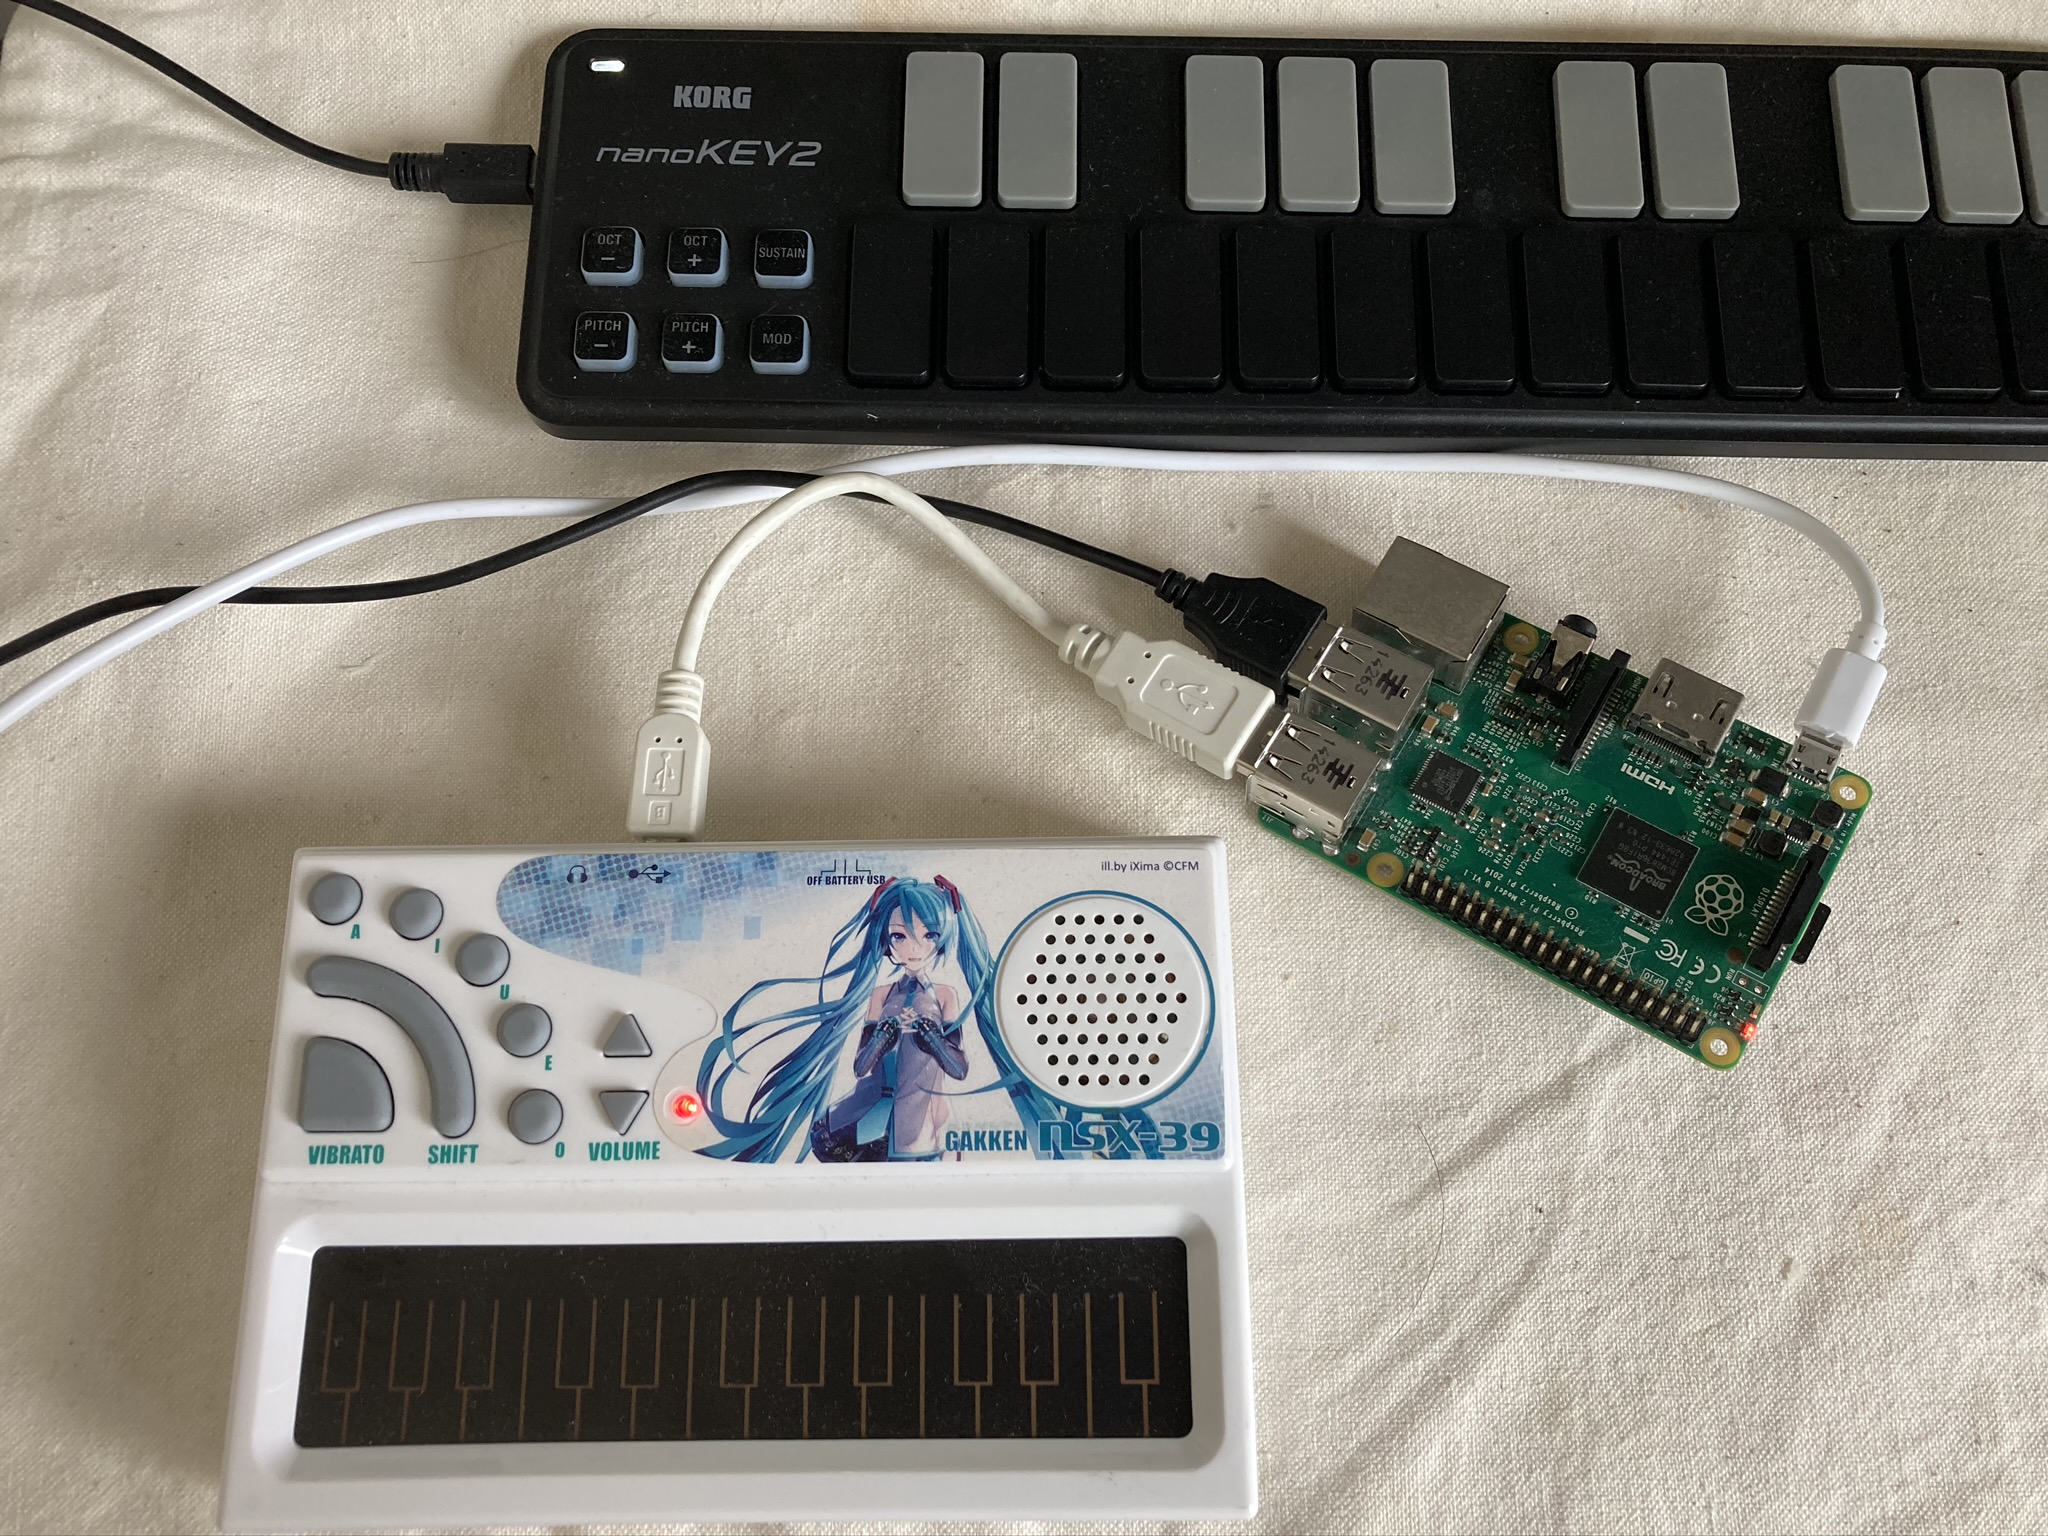
Using amidi command, Connected devices are shown.
> pi@raspberrypi:~ $ amidi -l
Dir Device    Name
IO  hw:0,0,0  NSX-39 MIDI 1
IO  hw:1,0,0  nanoKEY2 MIDI 1
If USB cable is not suitable, NSX-39 or nanoKYE2 is not shown. Please replace a MIDI cable.
For sending MIDI message from the nanoKYE2 to NSX-39, The command line tool aconnect is used. The command, acconect -l shows the list of MIDI device
>pi@raspberrypi::~ $ aconnect -l
client 0: 'System' [type=カーネル]
    0 'Timer           '
    1 'Announce        '
client 14: 'Midi Through' [type=カーネル]
    0 'Midi Through Port-0'
client 16: 'NSX-39' [type=カーネル,card=0]
    0 'NSX-39 MIDI 1   '
	接続元: 20:0
client 20: 'nanoKEY2' [type=カーネル,card=1]
    0 'nanoKEY2 MIDI 1 '
	接続先: 16:0
Client 16 connects to NSX-39 and 20 to nanoKEY2. For connecting 16 to 20, following commnad is used.
>pi@raspberrypi::~ $ aconnect 16.0 20.0
After this comannd, Client 16 connects 20. As a result when you play the nankKEY2, sound will come from the NSX-39.
To terminate the connection, use the following command:
>pi@raspberrypi::~ $ aconnect -x