Connectiong UART MIDI Shield to Raspberry Pi
Connect the UART of the Raspberry Pi to the UART of the MIDI shield to send and receive MIDI on the 5-pin DIN. The link is to SparkFun catalog page. The MIDI shield I have is one generation older.

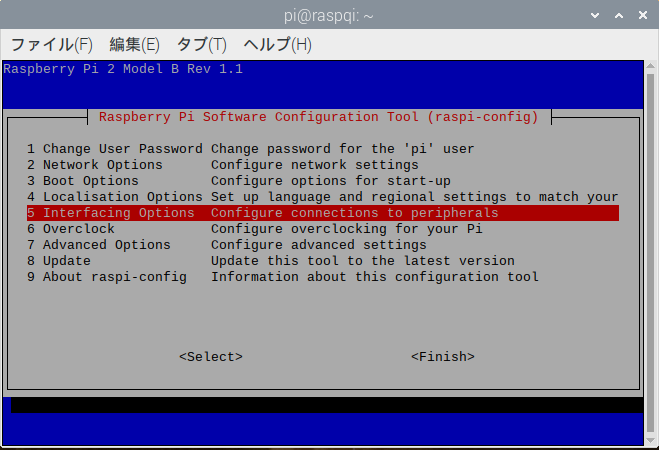
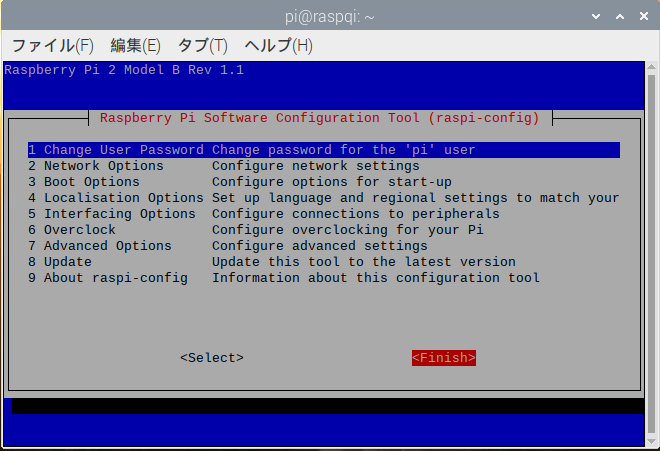
Configure the Raspberry Pi to handle serial communication. Open the Raspberry Pi Configuration page, 5. Select Interface Options.
> pi@raspberrypi:~ $ sudo /usr/bin/raspi-config
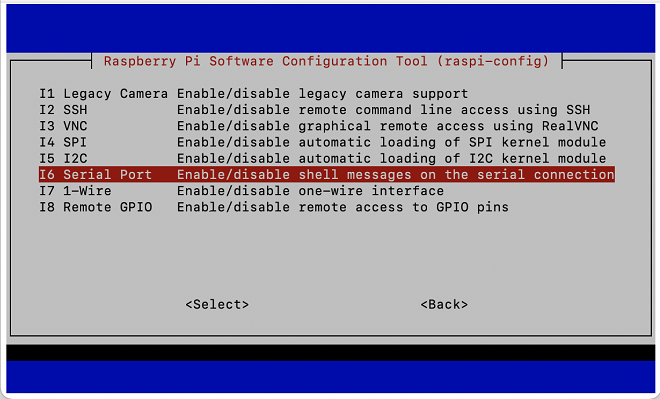
Select I6 Serial Poart menu.
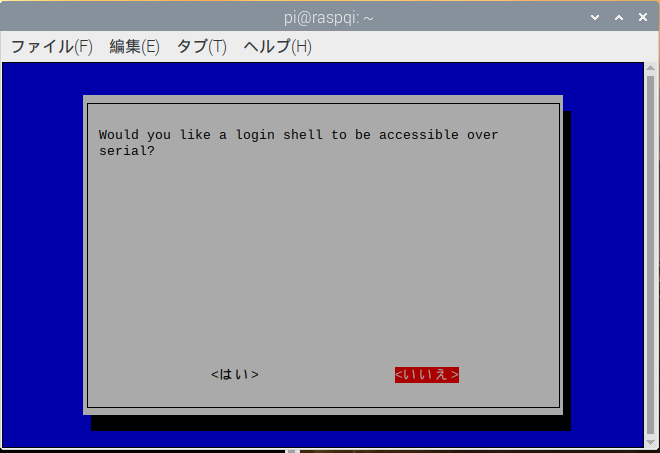
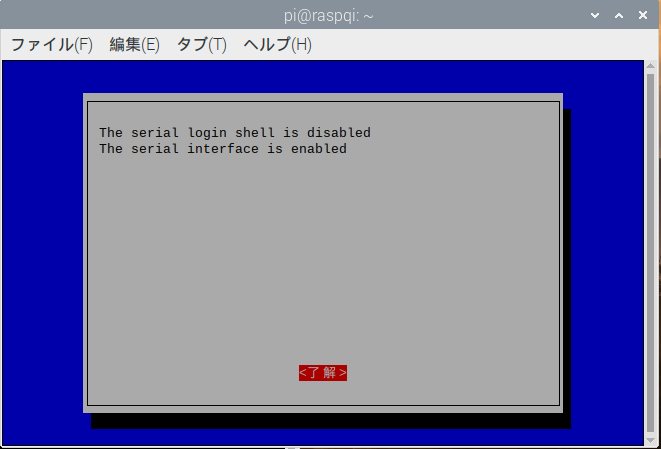
Ask "Would you like a login shell to be accessible over serial?", select "No".
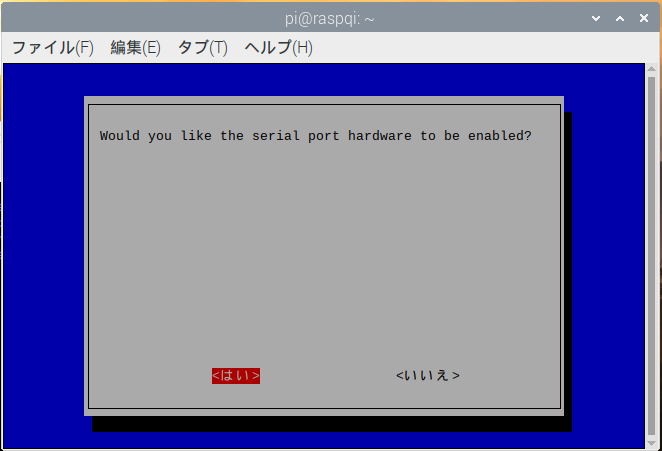
Next, ask "Would you like the serial port hardware to be enabled?", as using serial port, so select "Yes".
Click "Finish" and reboot
> pi@raspberrypi:~ $ sudo reboot
Phisical Connection
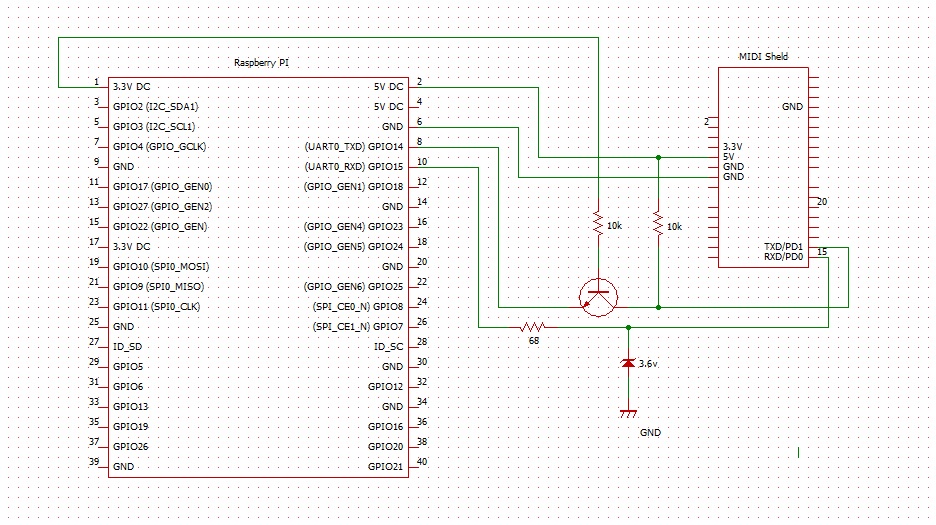
Connect the Raspberry Pi to the MIDI shield. One thing to take into account here is that the Raspnerry Pi's serial inputs and outputs (TXD, TRD) are 3.3V, while the MIDI inputs and outputs are 5V. You have to convert the voltage. I made the following circuit using parts I had on hand. An NPN transistor is used to boost the voltage to connect the Raspberry Pi's TXD to the MIDI shield's TXD. Also, to receive the output of the MIDI shield on the Raspberry Pi, the voltage needs to be lowered, so here it is converted using a Zener diode.
I use a Roland UM-ONE as a USB-MIDI interface. Connect the IN marking on the UM-ONE connector to the MIDI IN of the shield, and connect the OUT of the connector to the MIDI OUT of the shield. Depending on the interface, it may be the other way around.

プログラムサンプル
The following is a MIDI sending and receiving program using python.
Sending a Note On message
import serial
ser = serial.Serial('/dev/ttyAMA0', '31250', timeout=0.1)
ser.write(chr(0x90).encode())
ser.write(chr(0x60).encode())
ser.write(chr(0x7F).encode())
ser.close()
Receiving MIDI message
import serial
ser = serial.Serial('/dev/ttyAMA0', '31250', timeout=0.1)
mcnt=0
message=[0,0,0]

while True:
  a=ser.read()
  if(a!=b''):
    for x in a:
      if(x&0x80):
        message[0]=x
        message[1]=0
        message[2]=0
        mcnt=1
      else:
        if(mcnt==1 or mcnt==2):
          message[mcnt]=x
          mcnt=mcnt+1
      if(mcnt==3):
        for i in range(3):
          print(hex(message[i])," ",end="")
        print("")
        mcnt=0
ser.close()
C language program for MIDI
Accessing a serial port from C is the same as accessing a file. You write a program to open a file, write to the file, and read from the file.
Preperation
(1)Install WiringPi to handle the gpio.
> git clone https://github.com/WiringPi/WiringPi.git
> cd WiringPi
> ./build
(2)Edit /boot/config.txt and add the following three lines. Then reboot.
> sudo vim /boot/config.txt
# uart baud rate for MIDI
enable_uart=1
dtoverlay=pi3-miniuart-bt
dtoverlay=midi-uart0
> sudo reboot
The Raspberry Pi has several ports for serial communication. Among them, UART0 (/dev/ttyAMA0) is connected to the GPIO pins (pins 8 and 10). However, this port is usually used for Bluetooth. So we will wake up the other port, Mini UART (/dev/ttyS0), and move Bluetooth over to it. As a result, /dev/ttyAMA0 will be available for serial communication.
In the above program, enable_uart=1 enables the Mini UART and sets it to GPIO14,15. dtoverlay=pi3-miniuart-bt sets Bluetooth to Mini UART.This leaves UART0 free.
dtoverlay=midi-uart0 is the serial communication setting and sets the baud rate to 38kbps. It sets the MIDI communication speed to 31.25kbps.
It's a bit confusing. The baud rate in Python must be 38400.
Sending MIDI message
// serialmidisend.c
#include <stdio.h>
#include <wiringPi.h>
#include <wiringSerial.h>

int main()
{
    /* Open Serial Port */
    int fd = serialOpen("/dev/ttyAMA0",38400);
    if(fd<0){
        printf("can not open serialport");
    }

    serialPutchar(fd,0x90);
    serialPutchar(fd,0x40);
    serialPutchar(fd,0x7F);
    delay(1000);    //1sec待つ
    serialPutchar(fd,0x80);
    serialPutchar(fd,0x40);
    serialPutchar(fd,0x00);
    return 1;
}
>gcc serialmidisend.c -lwiringPi
Sending MIDI message
//serialmidireceive.c
#include <stdio.h>
#include <wiringPi.h>
#include <wiringSerial.h>

int main()
{
    /* Open Serial Port */
    int fd = serialOpen("/dev/ttyAMA0",38400);
    int n, i;
    unsigned char cc;

    if(fd<0){
        printf("can not open serialport");
    }

   while(1){
    /* Recieving message */
        n=serialDataAvail(fd);
        if(n!=0){
      	    for(i=0; i<n; i++){
                cc=serialGetchar(fd);
                printf("%02x:",cc);
            }
            printf("\n");
            serialFlush(fd);
	    }
    }
    return 1;
}
>gcc serialmidireceive.c -lwiringPi